QueueMonitor since version 1.5.9 can be installed on a Windows Server cluster as clustered application. Main addition to v1.5.9 release was ability to put QueueMonitor’s data folder on shared Cluster storage. That way there will be single shared task database used by both nodes. Or to be more precise – used by whichever cluster node is currently active.
For this tutorial we’ll install QueueMonitor Agent on Windows Server 2012 two node cluster, which already has MSMQ installed as clustered resource. We’ll add QueueMonitor to existing cluster MSMQ role, because that way QM has local access to MSMQ. Local access is always preferred since it offers better performance and it’s easier to set up security wise. Beside that, if we access MSMQ in remote instead of local mode there are some limitations meaning we’re limited in features QM can use.
Step by step instructions
- Install QueueMonitor on both nodes. We only need Agents here, Admin part is optional and can be installed here or on some other machine.
- Once installation is finished, stop QueueMonitor services on both nodes. While you’re at services panel, check out which account service uses to log on. By default it’s “Local System account”. That account will be used for all QM’s operations – access to queues, files, etc. So change it to e.g. some domain account if it better suits your setup.
- Following steps can performed on active node only, because clustering will take care of migrating changes to passive node
- Run regedit and locate HKLM\SOFTWARE\Cogin\QueueMonitor
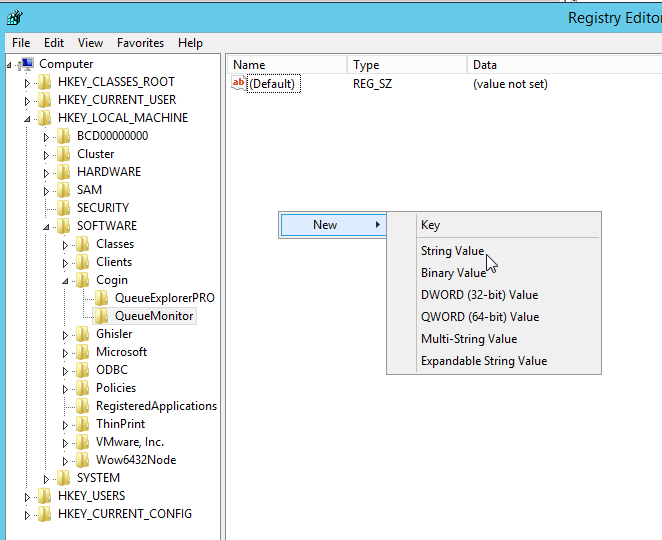
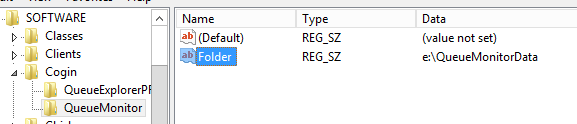
Create new String value named “Folder” and enter path to a folder on shared cluster storage. In our example it’s “e:\QueueMonitorData\”
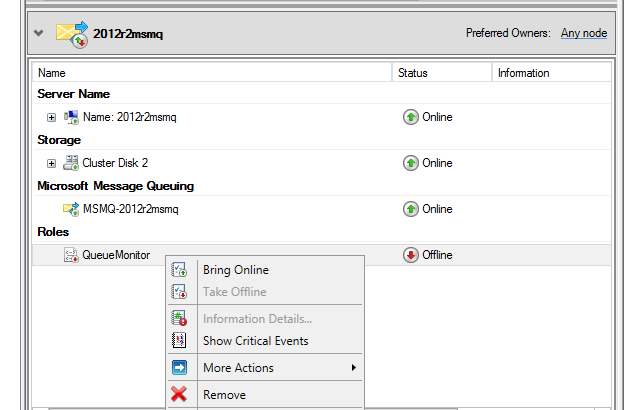
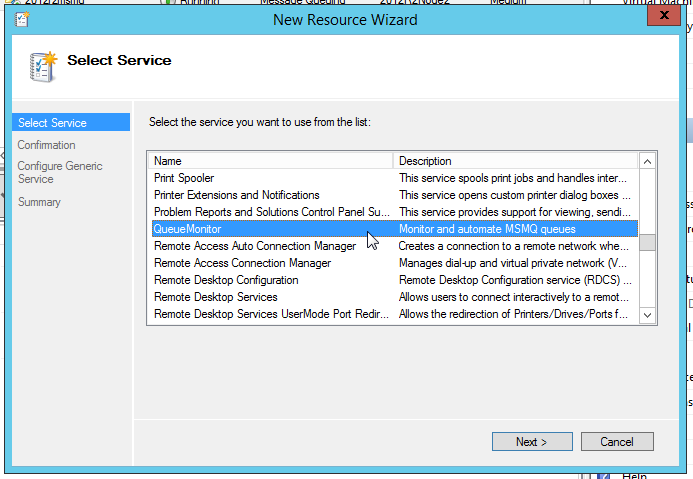
- Go to “Failover Cluster Manager”. Locate MSMQ role. While it’s selected, find “Add Resource” in right panel and choose “Generic Service”
- Select QueueMonitor service and finish wizard.
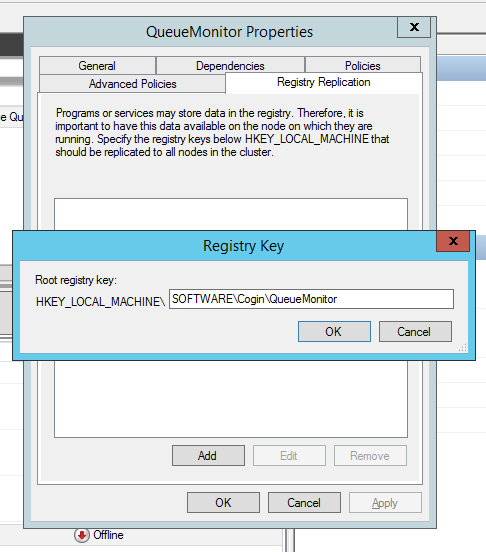
- After QueueMonitor is added, and while it’s still offline, right click on it and go to Registry Replication. Enter “SOFTWARE\Cogin\QueueMonitor” there. This is registry key we configured before. This way, it will be replicated to another node automatically.
- Now you can click “Bring Online” on QueueMonitor.
- Start QueueMonitor Admin service and connect to agent. You should use cluster’s address/name, and not a name of individual nodes! That way agent will always connect to clustered resource, regardless of which mahcine is currently active node for cluster.